-
-
Ensure material is unloaded from your Nautilus, then turn it off and unplug the power cord
-
Remove the Tool Cartridge from your Tool Head
-
Move the Tool Head to the front right corner of your Nautilus for easy access
-
Using the hex keys included in your Nautilus toolbox, remove the three indicated screws from the right side of your Tool Head
-
-
-
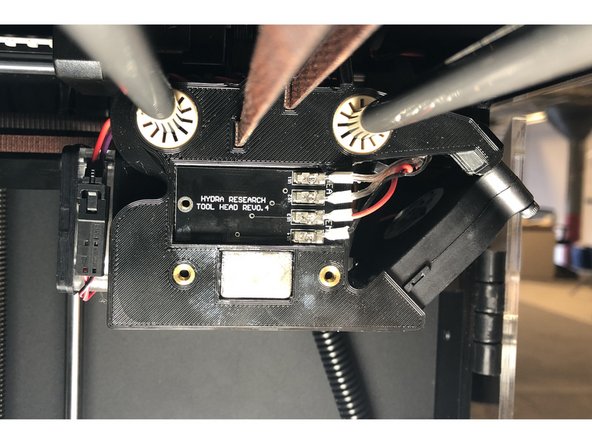
Insert a thin, rigid object (like a paperclip or dental pick) to compress each of the contacts and remove the ferrules
-
Press either up on the upper spring or down on the lower spring in each contact, one direction will make the ferrule easy to remove. If you have any issues, contact support.
-
CAUTION! Remove each wire by carefully pulling on the ferrule, it is easy to pull the wire out of the ferrule and damage your printer
-
Slide the PCB straight towards the back of the printer to free it from the lip on the Tool Head and then it will easily come free
-
-
-
Insert the new PCB into the Tool Head and slide it forward until it seats.
-
The PCB is properly seated when the hole in the PCB aligns with the threaded insert in the Tool Head
-
Reinsert the ferrules into the contacts on the PCB. Make sure you put the wires in the correct contacts as pictured.
-
From top to bottom, the order of the wires should be: Gold, Silver, Red, Black
-
CAUTION! Incorrectly wiring the PCB can damage your Nautilus
-
-
-
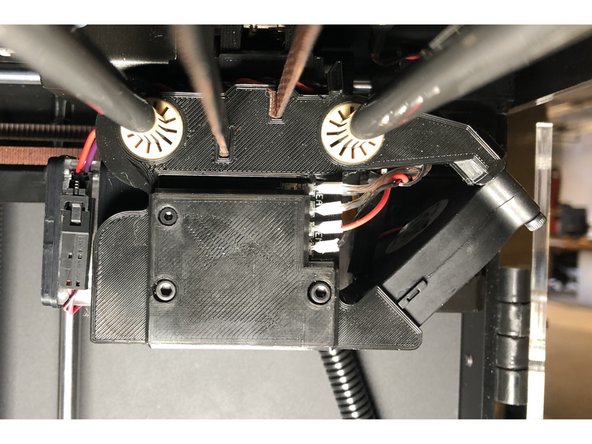
Using the included hex keys, reattach the Tool Head cover as pictured
-
Don't overtighten the screws, you can strip the threaded insert or damage the Tool Head
-